

~/.cline/remote/ on the host, starts it, and talks to it through an SSH tunnel. No apt, npm, root access, or open ports are needed.
This page assumes you have never used SSH. If you already log in to the machine with
ssh user@host and it does not ask for a password, skip ahead to Add the host in Cline.What you need
- Cline Desktop on macOS, Windows, or Linux.
- An SSH client on your computer. macOS, Linux, and Windows 10/11 include one; open a terminal and run
ssh -Vto confirm. - A remote machine running Linux (x64 or arm64) or macOS that you can reach over the network, with an account on it. Connecting to a Mac requires running Cline Desktop on a Mac. Windows hosts and 32-bit Raspberry Pi operating systems are not supported.
- Key-based login to that machine, with the host already trusted by your SSH client. The next section walks through both.
SSH in two minutes
SSH is a secure way to run commands on another computer. Two things have to be true before Cline can use it. Cline runsssh in the background with no way to answer prompts, so both must be set up ahead of time from a normal terminal.
1
Create a key pair (once per computer)
Instead of a password, SSH can prove who you are with a pair of files: a private key that stays on your computer and a public key you hand to servers. If you already have Press Enter to accept the default location. You can leave the passphrase empty, or set one and add the key to your SSH agent (see Troubleshooting).
~/.ssh/id_ed25519, skip this step.2
Install your public key on the remote machine
This is the one time you will type the account’s password. Replace Cloud providers usually do this for you when you create a VM: the key you chose in their console is already installed, so you may only need step 3.
dev with your username on the remote machine and dev.example.com with its hostname or IP address.- macOS / Linux
- Windows (PowerShell)
3
Log in once and trust the host
Are you sure you want to continue connecting (yes/no)?. Type yes. SSH remembers the fingerprint in ~/.ssh/known_hosts so it can detect if someone swaps the server out later.You should land in a shell on the remote machine without being asked for a password. Type exit to come back.Step 1: Add the host in Cline
Open Settings → Remote and click New Host.
Click Test Connection. Cline logs in over SSH and reports the host’s platform. A green Passed badge means your key and host trust are set up correctly. Testing also saves the host to the list on the left.
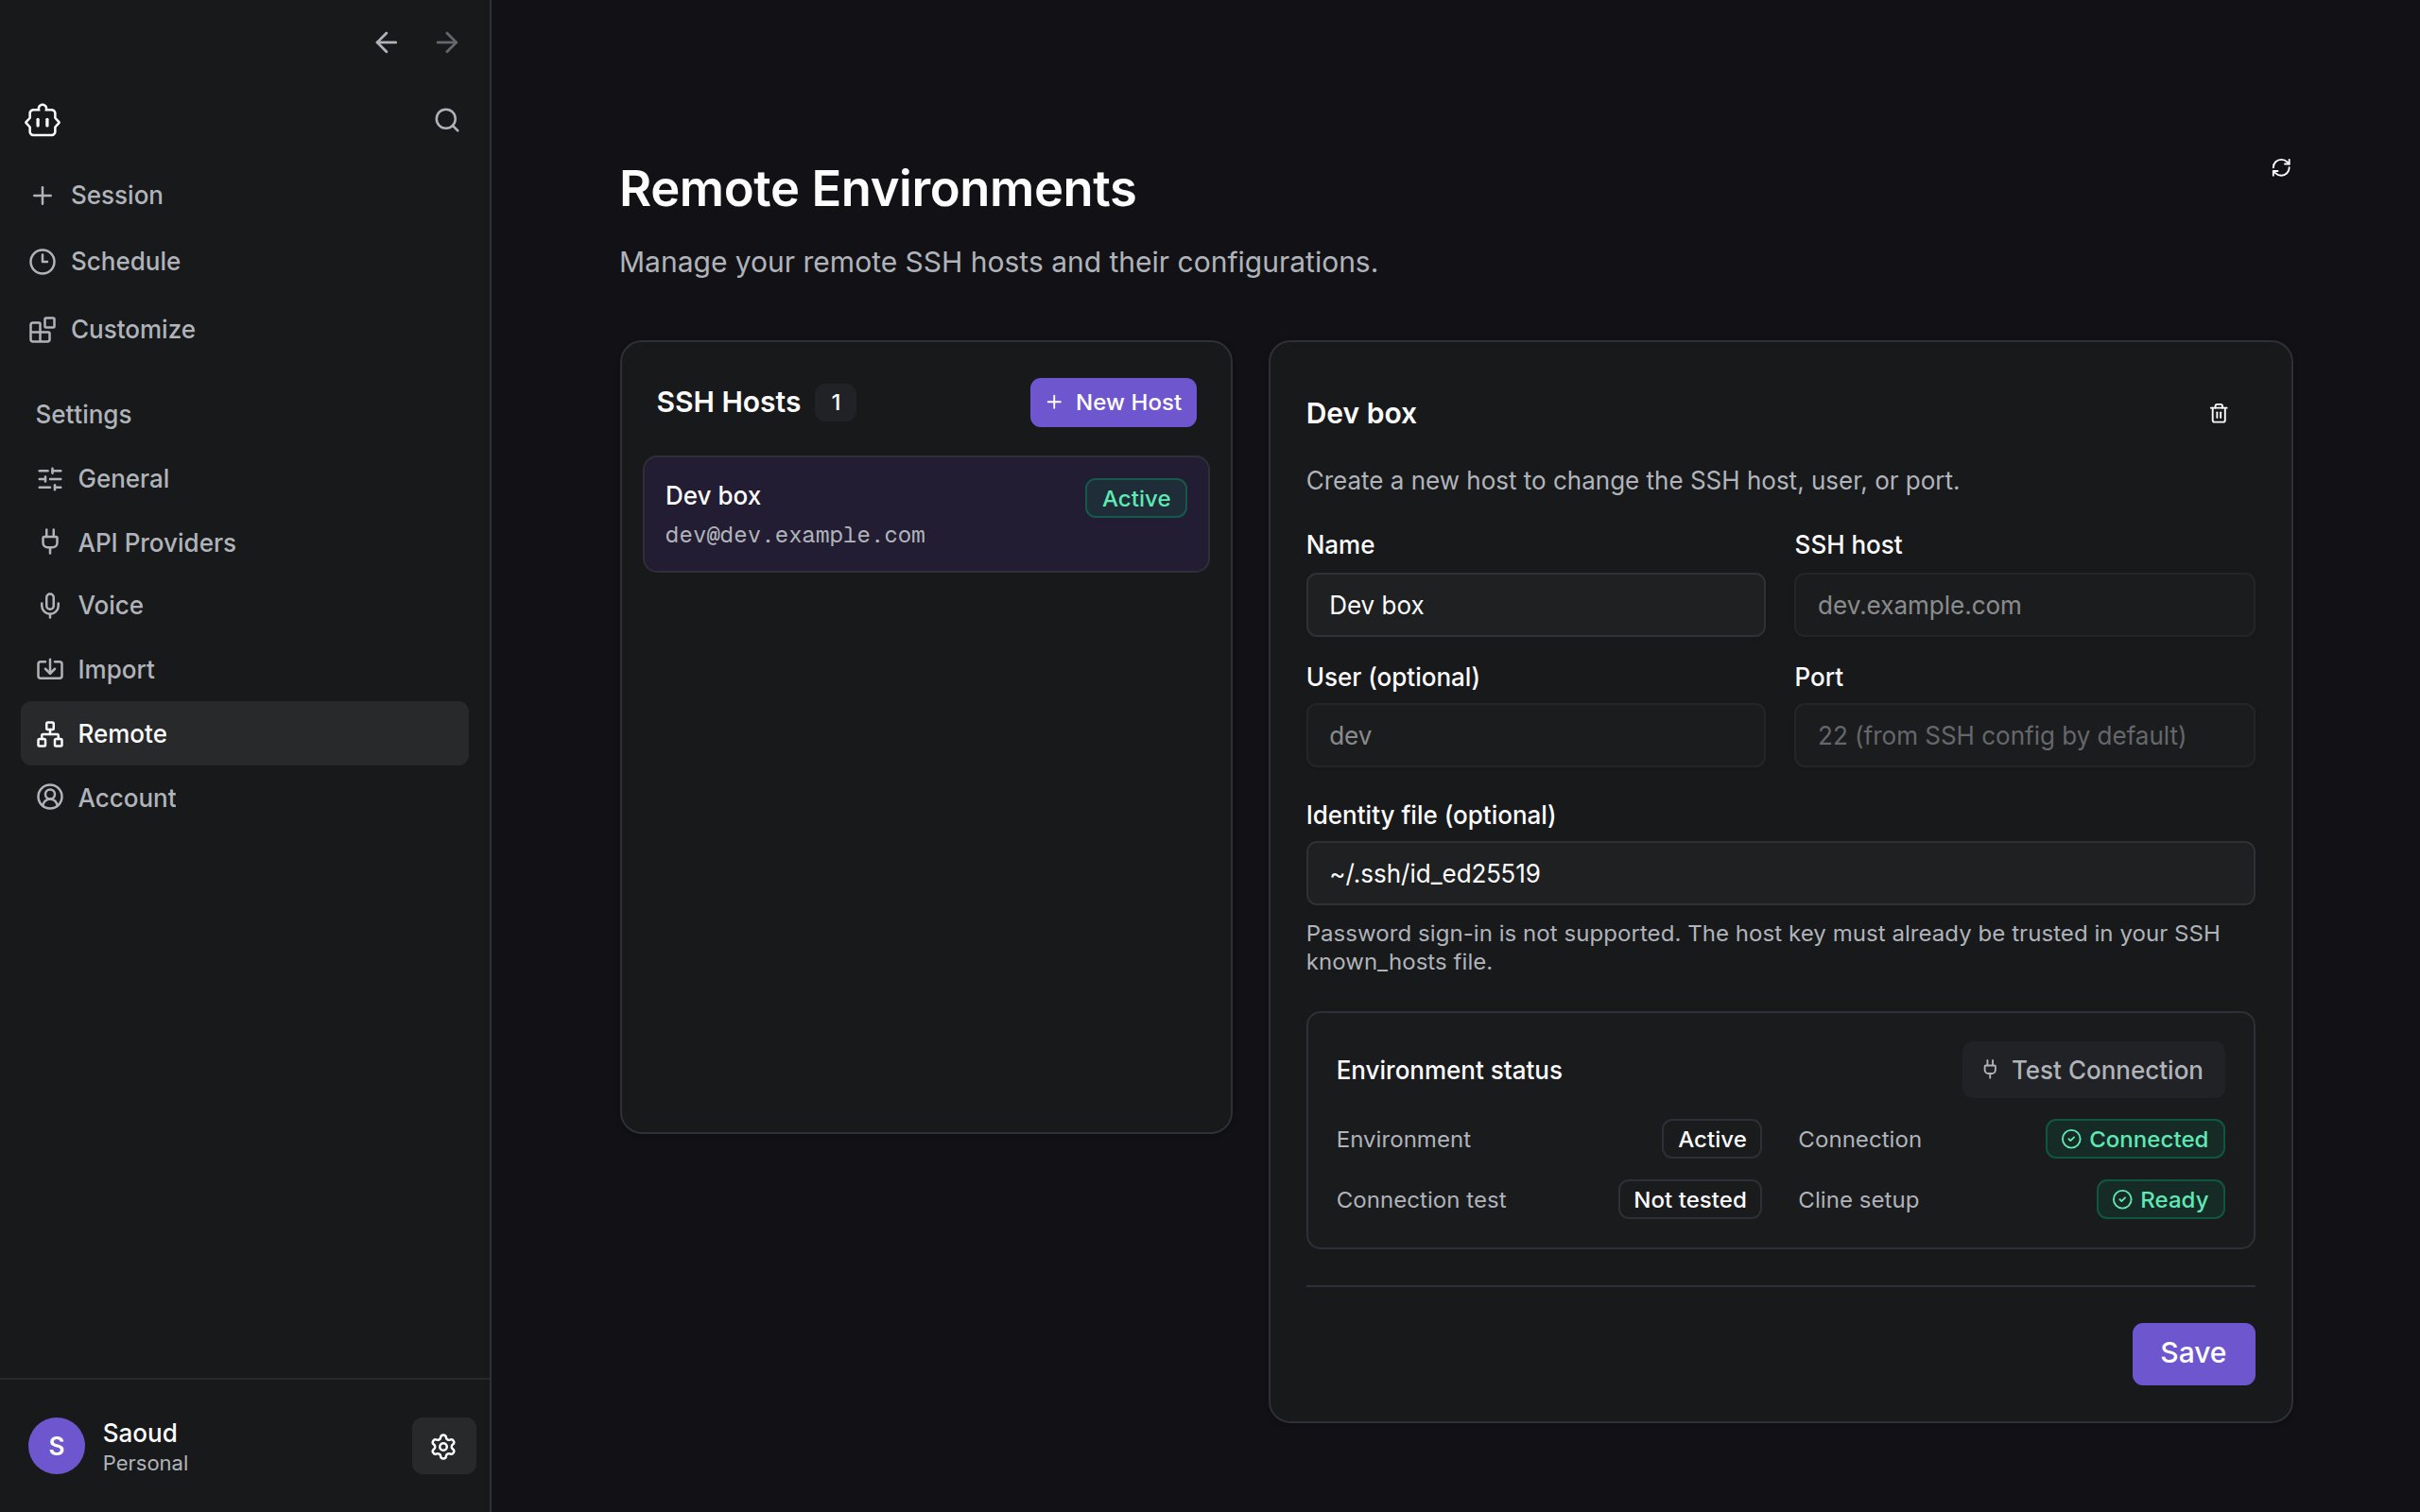
Saving or testing a host does not connect to it. Nothing runs on the remote machine until you select it in the next step.
Step 2: Connect and open a project
Go back to the new-session screen. The environment selector is the small laptop icon to the left of the workspace picker. It shows Local by default. Click it and choose your host under Remote.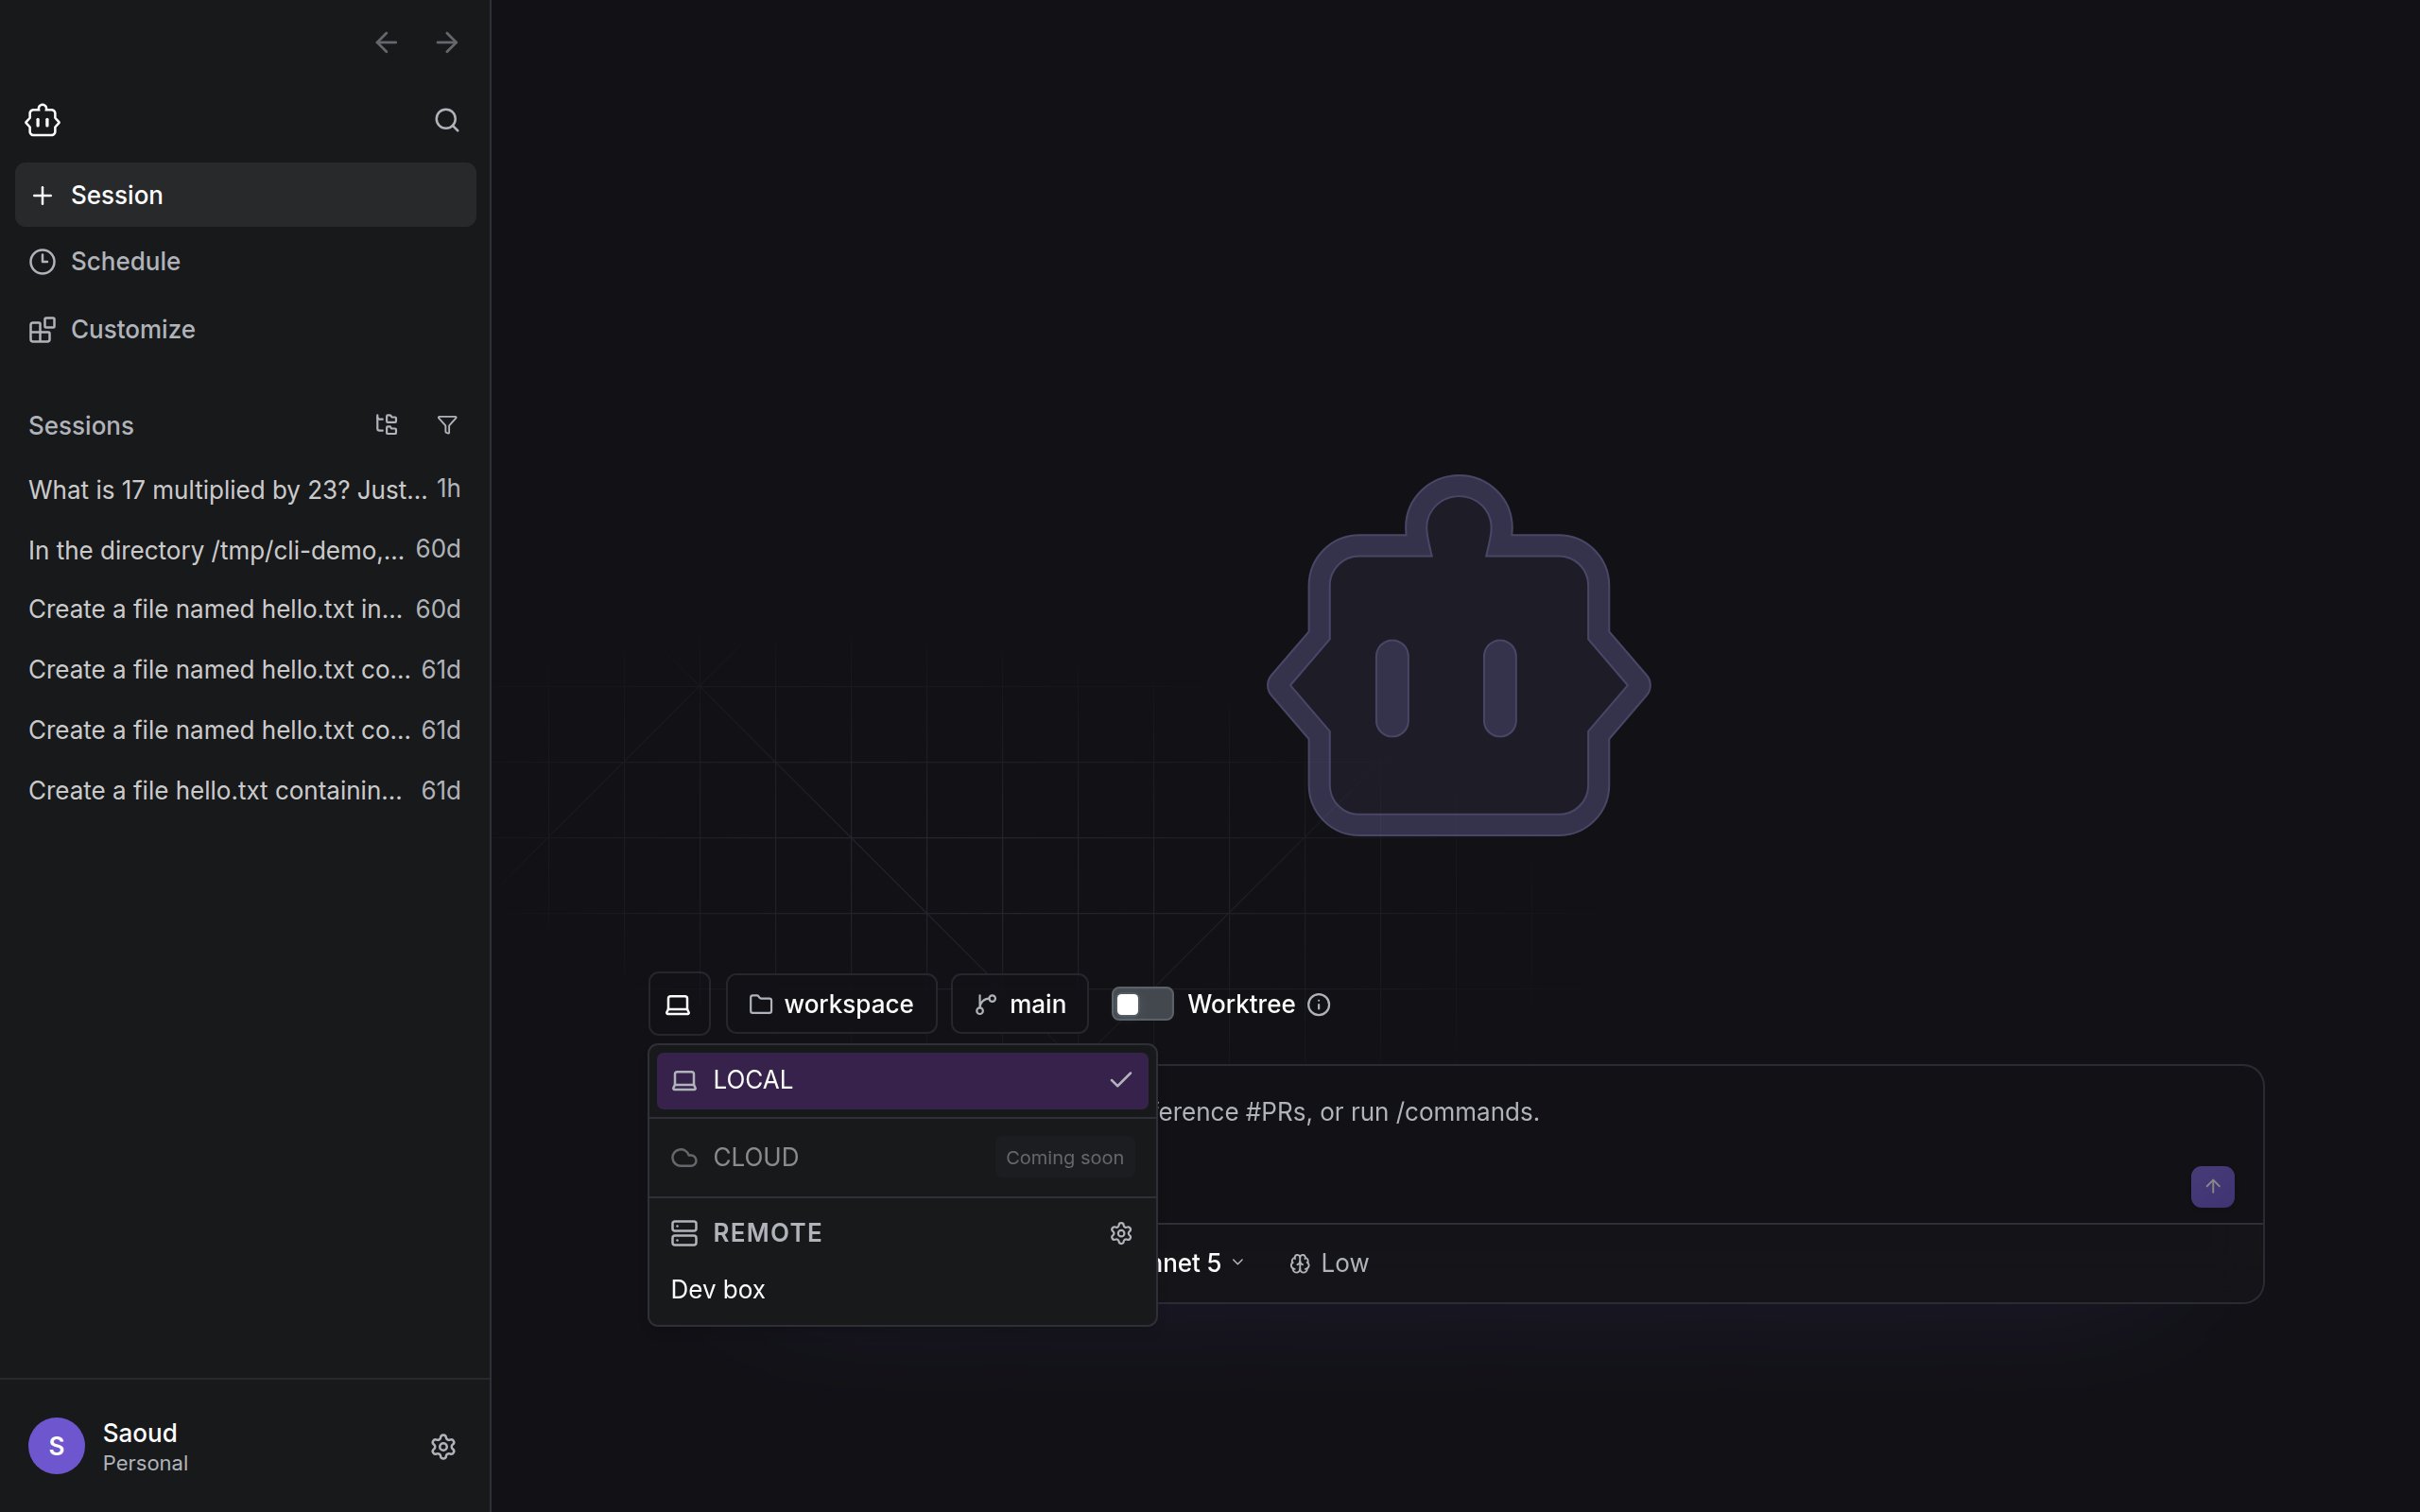
Step 3: Work as usual
Start a session the same way you would locally. Every tool call runs on the remote machine as the SSH user, in the folder you picked.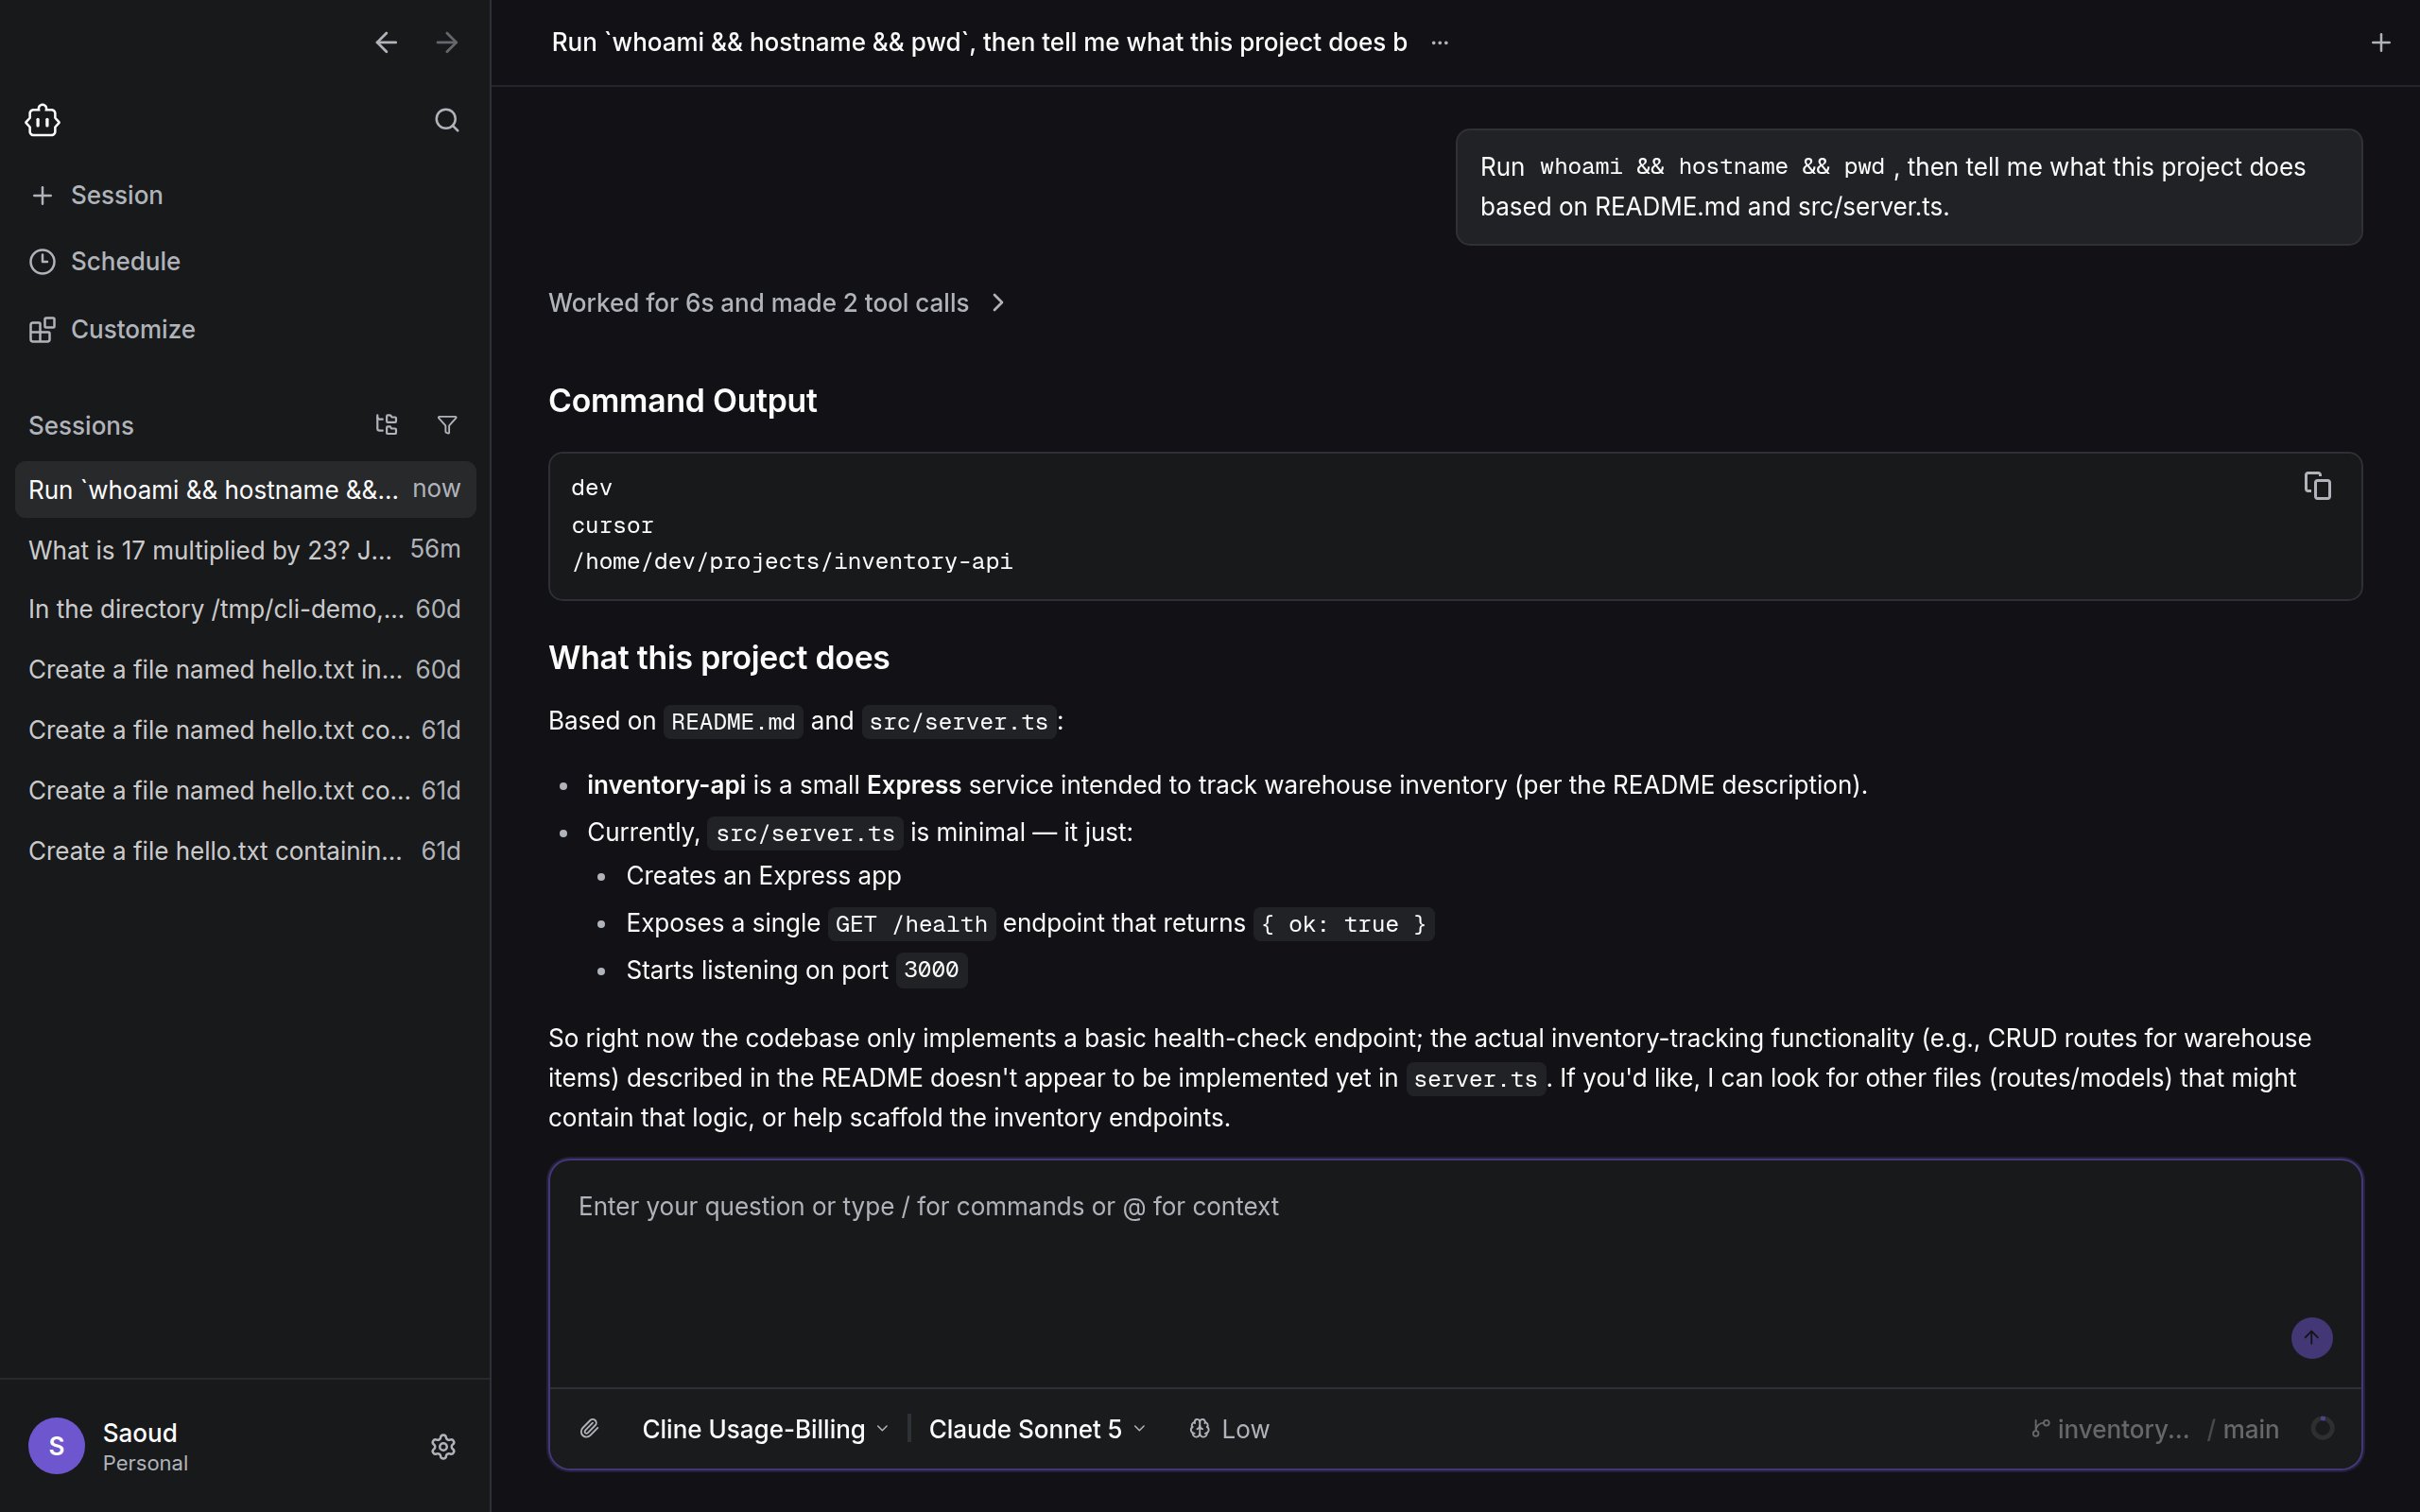
- Reading, searching, and editing files, and
@-mentioning them - Terminal commands and Git operations, including switching branches
- MCP servers and other tools configured on that machine (the helper picks up the remote login shell’s
PATH, so tools installed under your account are visible) - Session history, which is stored on the host
- The chat, approvals, and live streaming output
- Your provider settings. The current API key or access token is sent to the host for the session over the authenticated tunnel; it is not written to the remote machine’s provider settings
~/.cline/remote/ for a faster reconnect.
Limitations
- Key-based login only. Password prompts are never shown, so password-only accounts cannot connect.
- The host must already be trusted. Cline refuses unknown or changed host keys rather than prompting. Log in once from a terminal first.
- Remote hosts: Linux x64 and arm64, and macOS when Cline Desktop is running on a Mac. Windows hosts are not supported.
- One host at a time. Switching hosts disconnects from the current one.
- Not available in remote sessions yet: attaching files from your computer, and opening a remote file in a local editor.
- If the network drops, the tunnel closes after about 45 seconds and you reconnect by selecting the host again.
Troubleshooting
Cline shows the SSH client’s own error in the Environment status panel. The common ones:How it works
For those who want the details:- Cline runs your system
sshwithBatchMode=yesandStrictHostKeyChecking=yes, plus-i <identity file>and-p <port>if you filled those in. It never stores passwords or private-key contents; host settings live in~/.cline/data/settings/remote-environments.jsonwith owner-only permissions. - On connect it checks the host’s OS and architecture, then uploads a matching, self-contained Cline helper to
~/.cline/remote/(about 30 MB for Linux, sent once per Cline version and cached). - The helper starts a Cline Hub bound to the host’s loopback interface. Cline forwards it to a random local port with
ssh -L, so nothing on the host is exposed to the network. - Only Cline’s authenticated protocol crosses the tunnel. Tool execution and session storage happen on the host; the app is a client.