/ followed by the workflow’s filename in the chat (e.g., /deploy.md).
Why Use Cline Workflows?
- Automation: Automate repetitive tasks like setting up a new project, deploying a service, or running a specific test suite.
- Consistency: Ensure that tasks are performed the same way every time, reducing errors.
- Reduced Cognitive Load: Don’t waste mental energy remembering complex sequences of commands or steps.
- Contextual: Workflows run within your project’s context, so Cline has access to your files and can use its tools to interact with them.
How They Work
A workflow file is a standard Markdown file with a.md extension. Cline reads this file and interprets the instructions step-by-step. The real power comes from Cline’s ability to use its built-in tools and other capabilities within these instructions:
- Cline Tools: Use tools like
read_file,write_to_file,execute_command, andask_followup_question. - Command-Line Tools: Instruct Cline to use any CLI tool installed on your machine (e.g.,
git,gh,npm,docker). - MCP Tools: Reference tools from connected Model Context Protocol (MCP) servers.
Workflows vs. Rules
It’s important to understand the difference between Cline Workflows and Cline Rules, as they serve different purposes:| Feature | Purpose | When to Use |
|---|---|---|
| Cline Rules | Define how Cline should behave generally. They are always active (or contextually triggered) and set the “ground rules” for your project. | Enforcing coding standards, tech stack preferences, or project-specific constraints (e.g., “Always use TypeScript”, “Never edit the db folder”). |
| Cline Workflows | Define what specific task Cline should perform. They are sequences of steps invoked on-demand to automate a process. | Automating repetitive tasks like creating a component, running a release process, or generating a daily report. |
Example: Automating a Release
Imagine you need to prepare a new release for your library. Without a workflow, you might have to manually:- Open
package.jsonand bump the version number. - Run your test suite to make sure everything is green.
- Update
CHANGELOG.mdwith the latest commits. - Run
git commit -am "v1.0.1". - Run
git tag v1.0.1. - Run
git push origin main --tags.
release.md file. Then, you just type:
Where are Workflows Stored?
You can store workflows in two locations, depending on whether they are specific to a project or meant to be global.- Project-Specific Workflows
- Global Workflows
Store workflows that are specific to a single project in a
.clinerules/workflows/ directory in your project’s root.- Create a
.clinerulesfolder in your project’s root directory (if it doesn’t already exist).The.clinerulesdirectory may be hidden by default on some systems. You might need to enable Show Hidden Files to see it. - Inside
.clinerules, create aworkflowsfolder. - Create your Markdown workflow files (e.g.,
deploy.md) in this folder.
Manage Workflows
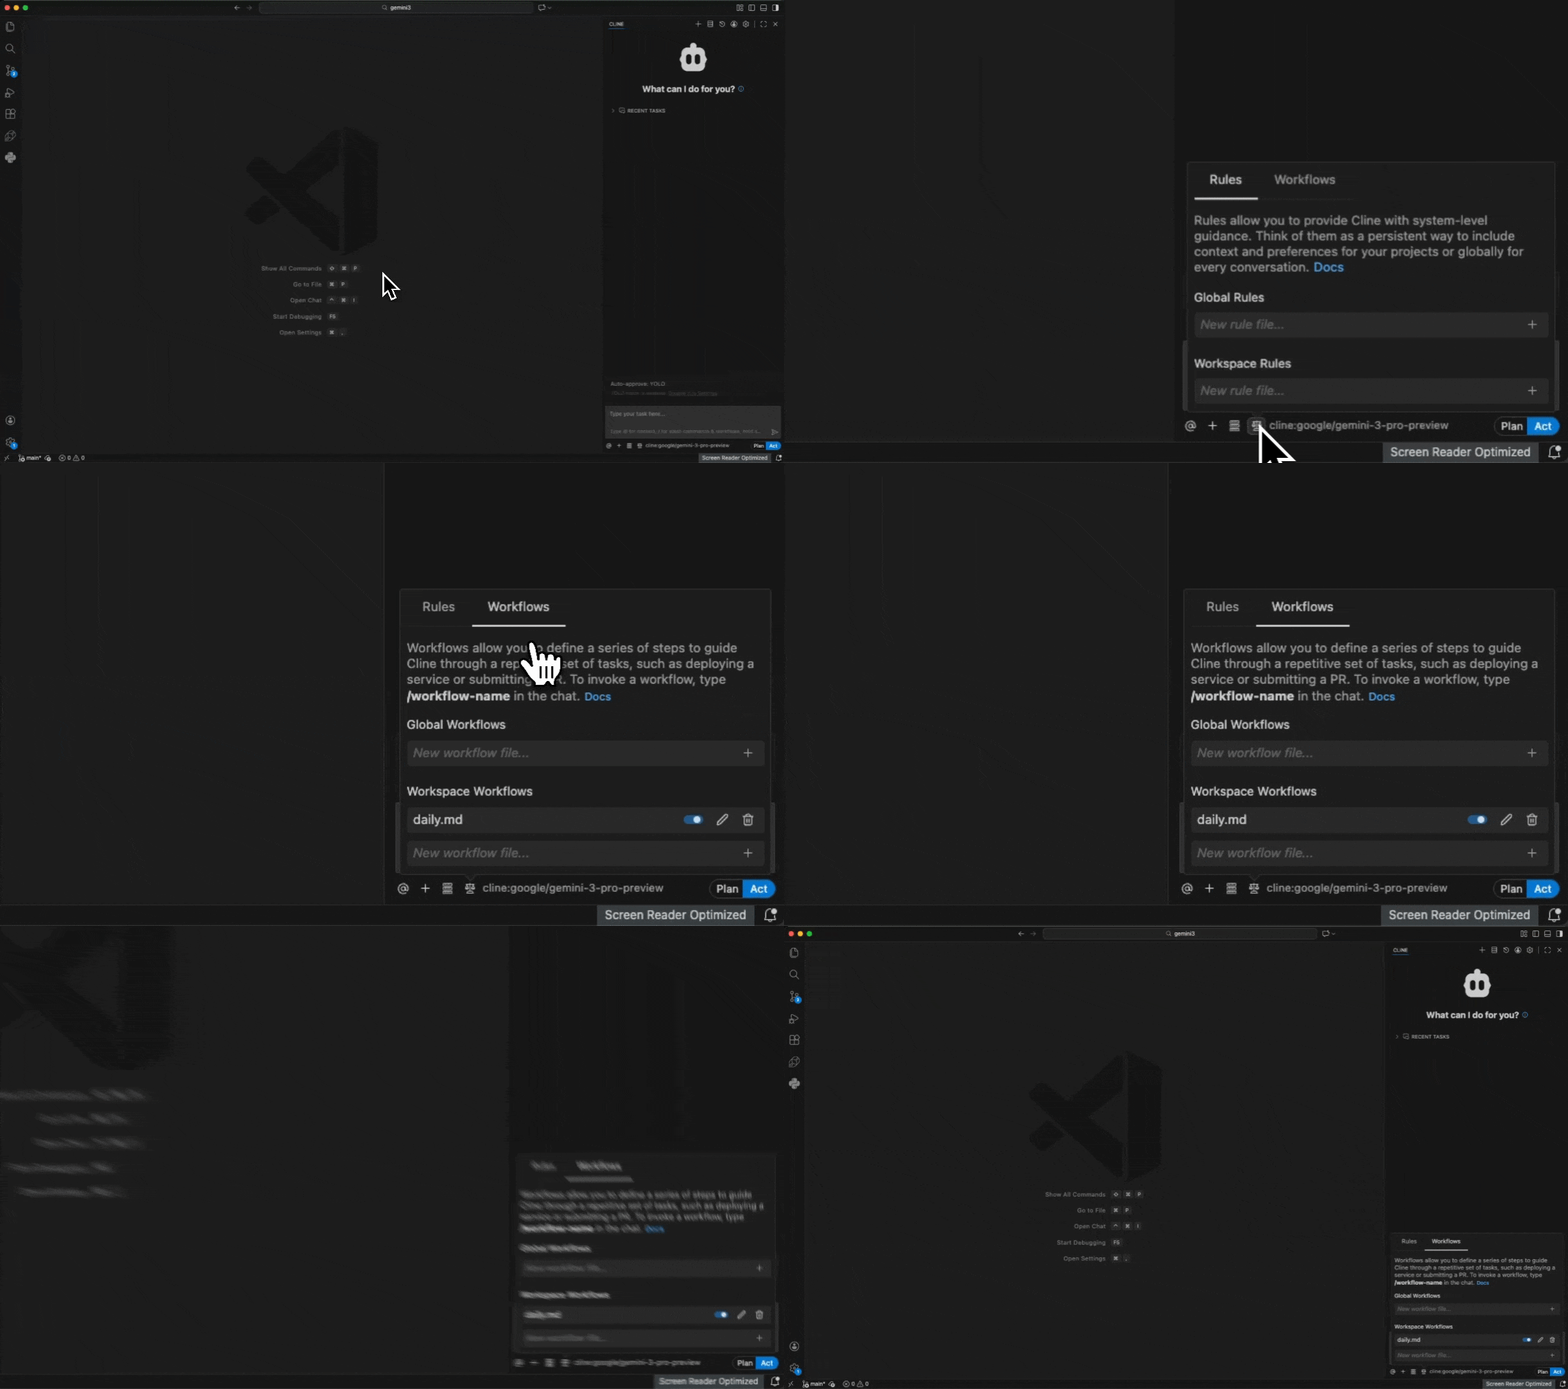
You can easily manage your workflows directly within the extension. This feature provides a unified interface to handle all your automation needs without leaving your editor or hunting through file directories. It consolidates both project-specific rules and global workflows into one view, giving you full control over your automation environment.- Click the Manage Cline Rules and Workflows button () at the bottom of the extension.
- This opens an interface where you can:
- View all available workflows: See a comprehensive list of both project-specific and global workflows.
- Control automation: Toggle individual workflows on and off as needed for your current task.
- Create and Edit: Add new workflows or modify existing ones directly within the interface.
- Clean up: Delete workflows you no longer need.

Manage Workflows
Workflow Structure Example
Here is a simple example of a workflow file (daily-changelog.md) that helps you create a daily changelog.
daily-changelog.md
Breakdown of the Workflow
This workflow demonstrates that you don’t always need to provide specific tool calls (like XML blocks). Cline is smart enough to interpret your high-level instructions.-
Step 1: Check recent git commits
- We give Cline a specific command to run. This ensures it gets exactly the data we want (today’s commits).
-
Step 2: Summarize your work
- Instead of forcing a specific tool, we simply tell Cline what to do: “ask for a summary”.
- Cline knows it needs to use its capabilities to ask you a question.
-
Step 3: Create/Append to daily changelog
- We describe the desired outcome: “append to the
changelog.mdfile” with specific content. - Cline figures out how to format the file and use its file-writing tools to accomplish the task.
- We describe the desired outcome: “append to the

